|
Pumpkin Wall Hanging - Page 2 |
|
Now sew two Color 3 2-1/2" x 13-1/2" strips to two opposing sides of the pumpkin, pressing seams towards strips. Then sew two more strips of the same size to the last two sides, again pressing towards strips. Using a rotary cutter, mat and ruler, cut off the tips of the black strips, leaving 1/4" beyond the tip of the pumpkin area... |
|
|
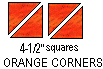
Cut two 4-1/2" squares of your Pumpkin fabric. Cut each one in half once on the diagonal to make four half square triangles... |
|
|
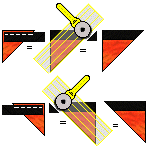
Next, sew a Color 3 1-1/2" x 8" strip to the top of a Color 1 half square triangle, press seam towards strip. Using a ruler and rotary cutter, cut off end even with the slant edge of your triangle. Make two units like this, and two in the opposing direction, for the wall hanging's four corners... |
|
|
Next sew Color 3 1-1/2" x 8" strips to the outer edge of the units we just made, again trimming off the ends even with the slant edge of the orange triangles. Make four corner units like this... |

|
|
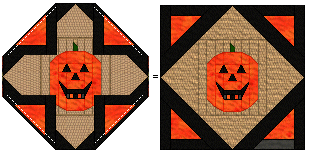
Sew the four corner units to the edges of the Pumpkin unit, pressing seams towards corner units... |
|
|
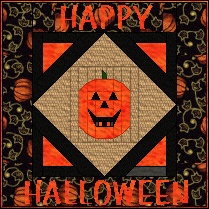
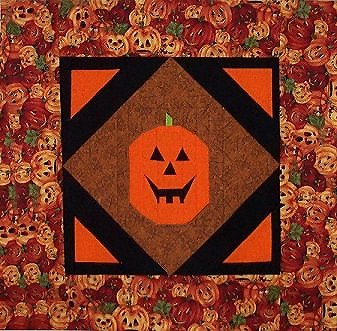
Now sew two 4-1/2" x 17-1/2" strips to the wall hanging's top and bottom....then two 4-1/2" x 25-1/2" strips to the top and bottom. Add Lettering if you like...quilt and bind as desired! Click here for letters H+A , P+Y , L+O , W+E and N ! (Resize those as desired...don't forget to add seam allowances to the letters!) Happy Spooky Quilting Folks! Marcia :o) Here's Dessa's! and Elizabeth's! on to Page 3 for the Supplies Needed!
|
|
|
|
||
|
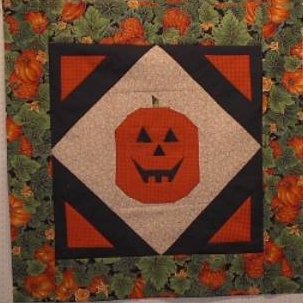
Original Block |
http://www.quilterscache.com |