|
 |
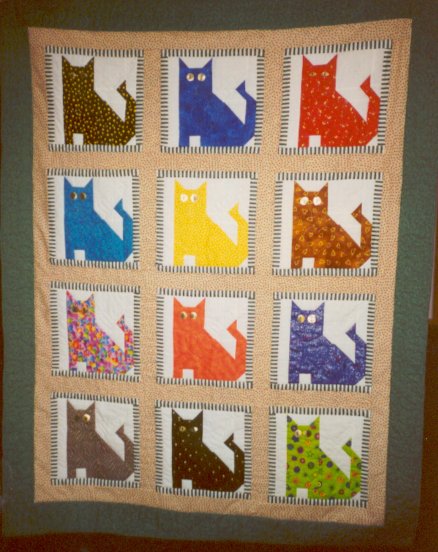
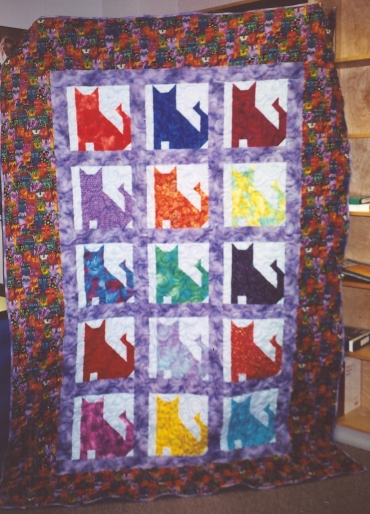
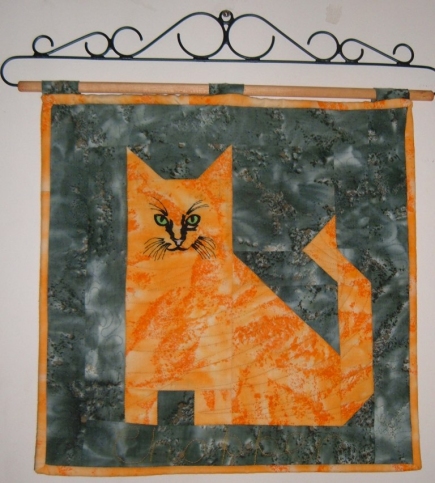
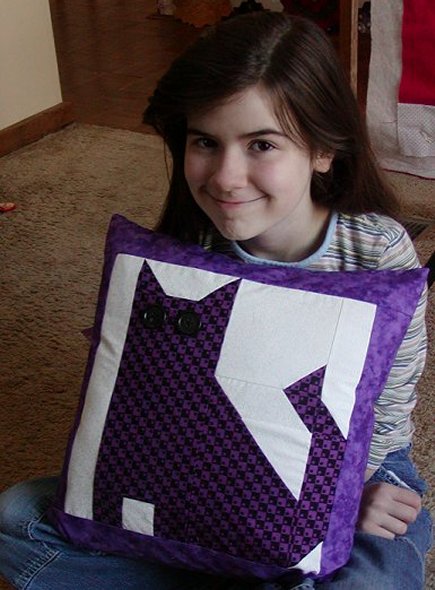
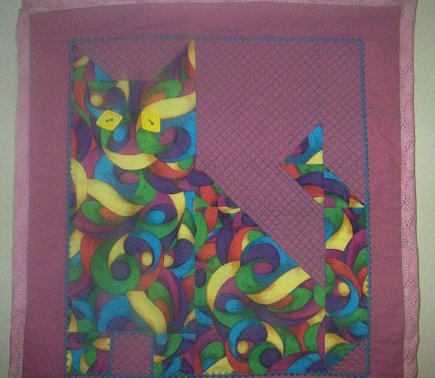
Kids Can Quilt!! |
|
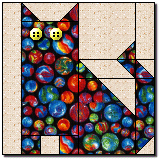
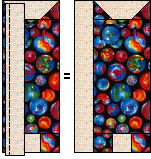
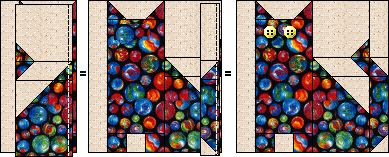
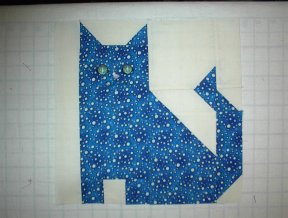
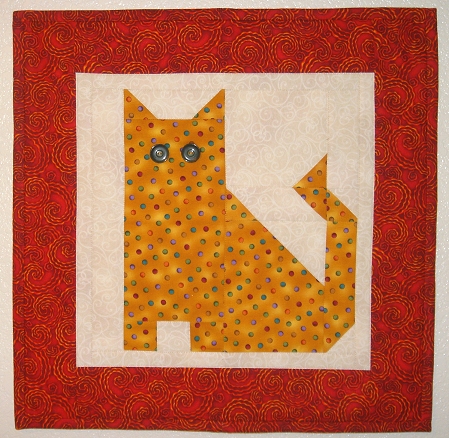
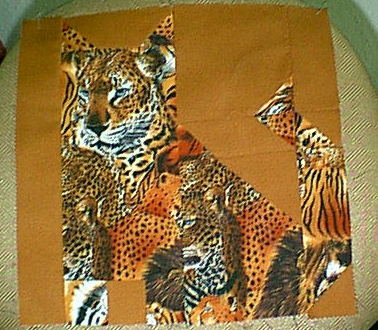
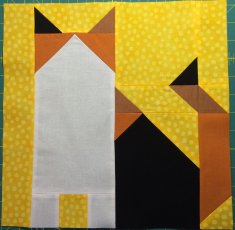
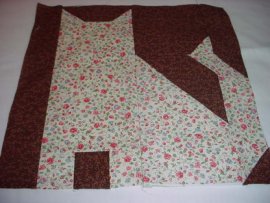
This makes a 12 inch cat
block! This one is a bit more difficult, so it may need some adult assistance! |
|
***Parents
and/or teachers...note that not all children... nor all age groups are good with rotary
cutters!...You may want to help with that part! This
is an original pattern. Please abide by the Terms
and Conditions of use! :o) |
|
Cut your pieces according to the
following: |
|
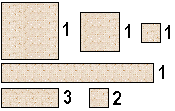 |
From your background fabric, cut the
following pieces: One 5" square, one 3-1/2" square, one 2-3/8 "
square, two 2" squares, one strip 2" by 12-1/2 inches, and three strips
2" by 5". |
|
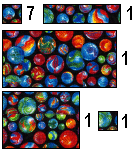 |
From your cat fabric, cut the following
pieces: seven 2" squares, one 2-3/8" square, one rectangle 5" by 9-1/2", one rectangle 5" by 6-1/2", and one strip 2" by 6-1/2". |
|
 |
To make the cats EARS, place a cat
fabric 2" square right sides together, lined up with one end of a background
color 2" by 5" strip. On the back of the small square, lightly draw a line
from the lower right corner to the upper left corner corner, and sew ON this marked line.
Do the same with another cat fabric small square on the other end of the same background
strip, but drawing the line from the lower left corner to the upper right corner. |
|
 |
To make the cats LEGS, sew a background
2" square, right sides together, to a cat fabric 2" square. Then add another cat
fabric 2" square to the other side of the background square. |
|
 |
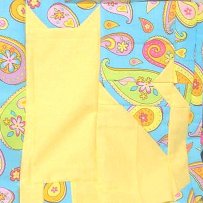
Now sew the cats EARS to the top of the cat
fabric 5" by 9-1/2" rectangle, right sides together. Sew the FEET to the bottom
of the same rectangle. |
|
 |
Sew the background fabric 2" by 12-1/2" strip to the left side of the ears/body/feet unit we just made, right sides
together. Set this aside for now. |
|
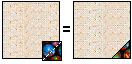 |
Place a cat fabric 2" square right
sides together to, and lined up with, the lower right corner of the background fabric
5" square. Draw a light line on the back of the small square from the lower left
corner to the upper right corner, and sew ON this line. |
|
 |
Now place a cat fabric 2" square
lined up with the left end of a background fabric 2" x 5" strip, right sides
together. On the back of the small square lightly draw a line from the lower right
corner to the upper left corner, and sew ON this line. Repeat this with another 2"
cat fabric square on the other end of the same background fabric strip. |
|
 |
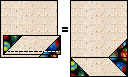
Now place the background fabric 3-1/2" square lined up with the top right of the cat fabric 5" by 6-1/2"
rectangle, right sides together. On the back of the background fabric square, lightly draw
a line from the top left corner to the bottom right corner, and sew ON this line. |
|
 |
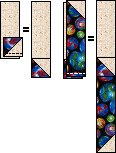
Sew the background strip with the two cat
fabric ends to the bottom of the square we just made, right sides together. |
|
 |
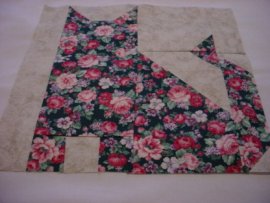
Now sew the cat fabric rectangle with the
background fabric corner to the bottom of the unit we just made, right sides
together. This
is the middle unit of the cat block. Set it aside for now. |
|
 |
Place the remaining background fabric
2" square atop the left end of the cat fabric 2" by 6-1/2" strip with all
edges aligned, right sides together. On the back of the small square, lightly draw a line
from the lower right to the upper left corner, and sew ON this line. |
|
 |
To make the two colored square, called a
"half square", stack the Background fabric 2-3/8" square atop the cat
fabric 2-3/8" square, right sides together. On the back of the top square lightly
draw a line from the upper left corner to the lower right corner. Now sew 1/4" away
from this line, on each side .Trim back to a 2" square if needed. Cut
this apart on the line you drew from corner to corner, between the lines of sewing. This
will give you two half squares, but you only will need one for this block! |
|
 |
Sew the half square to the bottom of the
last background fabric 2" by 5" strip, right sides together. Be sure you are
sewing the half square on in the right direction. Now sew the cat fabric with background
fabric end unit to the bottom of the half square, right sides together. This is the right
side of the cat block. |
|