|
|
|
|
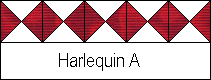
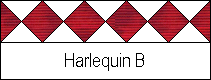
Two similar looks, but very different construction methods! |
|
|
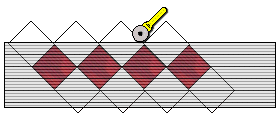
For Harlequin Border A, you need two squares, each 1 1/4" larger than the finished width you want your border. Stack these squares right sides together and all edges aligned. On the back of the top square lightly draw the diagonal, and sew a scant 1/4" away from the marked line, on each side of it. Cut this apart on the drawn line between the rows of stitching. Stack the units as they are, and using a rotary cutter and ruler, cut them from the corner to the mid way point of the longest edge. Sew together pairs of quarter square triangles to make each pieced square... |
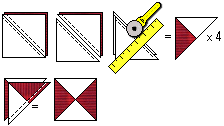
| Sew the pieced squares together end to end to make the border... |
|
|
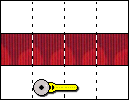
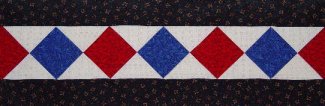
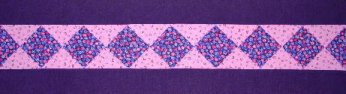
To make Harlequin border version B, sew strips of fabric together along the long edges, using a scant 1/4" seam. The outer strips should be 1/2" wider than the center strip. Press seams towards darker fabric. Cut this apart as shown at left at intervals the width of the size you cut your center strip... |
|
|
Sew the pieced strips together
staggered, keeping the points of the center square aligned. Using a
ruler and rotary cutter and mat, cut off the excess fabric 1/4"
beyond the top points.
EXAMPLE: For a roughly 4" border, cut center strips 3 1/2" wide...cut outer strips 4" wide...cut these into 3 1/2" widths, then stagger... |
|
|